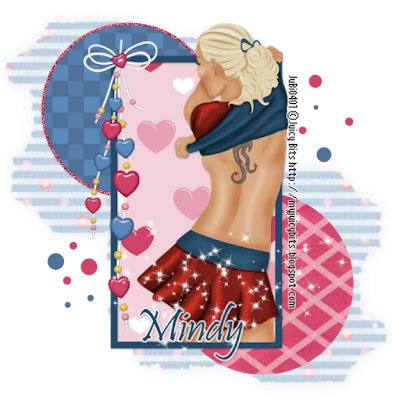
For this tutorial you will need the following:
Paint Shop Pro, I am using PSP X, you should be able to use any version.
Tube of choice, I am using the artwork of Aiya at Juicy bits which you need a license to use. You can get it HERE.
Scrap kit of choice. I am using High School Sweetheart by Aiya at Juicy Bits. You can find it HERE.
Font of choice, I am using
Mask: Aqua Rebel 315 mask 50, which you can get HERE.
Plugins: Eye Candy 3.1 glow (or if you have a different version of Eye Candy, use Gradient Glow)
If you have some sparkles from a scrap kit, you can add those too. I have some that were shared by someone who made them in a group I belong to for a grab bag challenge and they can't be shared. There are a lot of them around, so I'm sure you have some or can find some easily!
Just remember that my choices of papers and elements is just a suggestion, change it up and make it yours! You don't have to follow mine exactly.
Let's get started!
Open a new canvas about 700 x 700, white background. We'll crop it and resize at the end. This just gives us some extra room to work.
Set your foreground to #264a6a and your background to null. Using your preset rectangle tool with the width set to 12, draw out a large rectangle. Objects, align, center in canvas. Convert to raster layer.
Click inside the rectangle with your magic wand, selections, modify, expand by 3 selections, invert.
Open paper 9, copy and paste as a new layer, click delete on your keyboard, drag it below the frame layer. Leave selected.
Open your tube, copy and paste as a new layer, arrange how you want in your frame, erase the bits that hang over the frame with your eraser tool. Deselect, add a drop shadow to your tube and your frame layers.
Open paper 4, set your background as a pattern using your paper, set your foreground to null. Draw out a circle. Convert to raster layer. Selections, select all, defloat, modify, expand by 4. Add a new raster layer and flood fill with #cf4368. Adjust, add/remove noise with the following settings: Random, Monochrome checked and Noise set at 100%. Add a drop shadow. Merge. Pull to the top left side of your frame.
Do the same as above for a second circle that you will pull to the bottom right side of your frame.
Open the heart strings element, copy and paste as a new layer, resize by about 80%. Arrange to the top left, add a drop shadow.
Open paper 6, copy and paste as a new layer just above your white background.
Open your mask, go to layers, new mask layer, from image. Look for your mask in the drop down box and apply it to the paper. Delete the mask layer and merge your group. You may have to resize your mask layer. I resized mine by 93%, then I mirrored it and lowered the opacity to 60.
If you want to add some small circles, just pick a color and set it as your background color and draw out some small circles around your frame like I did on mine.
Add your sparkles if you are using them.
Add your copyright info.
Add your name. I used Eye Candy 3.1 glow set at white and width at 4 then added my drop shadow.
Crop your tag and resize.
If you want to save as a transparent tag, then save it as a .png file.

No comments:
Post a Comment