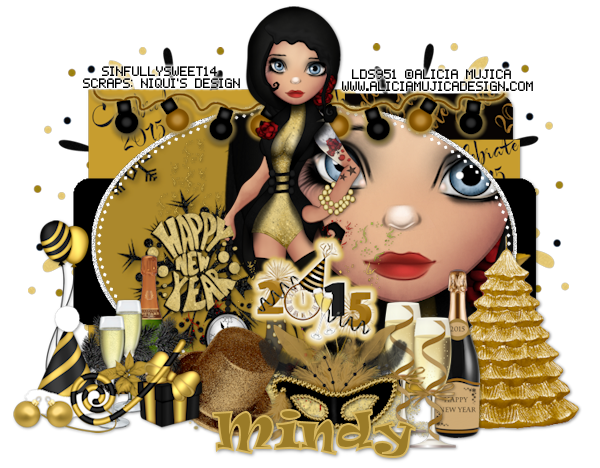
Snaggable versions of this tag in my Fotki album
For this tutorial you will need the following:
Paint Shop Pro, I am using PSP X7, you should be able to use any version.
Tube of choice, I am using the artwork of Alicia Mujica which you need a license to use.
This tube is from the December 2014 Sweet Pack.
Scrap kit of choice. I am using a PTU kit by Niqui's Designs called Celebrate 2015
Font of choice, I am using Ravie
Plugins: Alien Skin Eye Candy 4000 Gradient Glow (optional for lights)
Just remember that my choices of papers and elements is just a suggestion, change it up and make it yours! You don't have to follow mine exactly.
Add a drop shadow of your choosing to tubes & elements throughout. I usually use 1, 1, 50, 5 unless otherwise noted.
Let's get started!
Open your template, shift D to duplicate and close the original
Delete the following layers: CR, 1, 11, 12, 13
Change your canvas size to 850 x 700 so you have room to work
Fill the layers with papers, to do this make sure the layer you want to fill has been clicked on in your layer palette.
Click outside the shape with your magic wand, open your paper, copy and paste as a new layer,
click delete on your keyboard.
Delete the original template layer
Some layers, like the frames, you may just want to flood fill with a color from your kit. To do this, click on the layer in your layer palette, add another raster layer above it,
click outside the shape with your magic wand, and flood fill it with your color
Delete the original template layer
I used the following papers for each layer
layer 2 use paper 6
layer 3 use paper 6
layer 4 use paper 7
layer 5 use paper 7
layer 6 use paper 11
layer 7 leave as is
layer 8 use paper 15
layer 9 leave as is
layer 10 leave as is
Make the big oval layer in the center active, click outside it with your magic wand
copy and paste your tube, arrange it in the oval on the left side, click delete on your keyboard
Paste your tube again, resize 28% arrange in the middle of the template
Now add your elements:
copy and paste your tube, arrange it in the oval on the left side, click delete on your keyboard
Paste your tube again, resize 28% arrange in the middle of the template
Now add your elements:
element 28 resize 45% arrange on bottom left side
element 25 resize 45% arrange on bottom right side
element 46 resize 30% arrange to the left of the tree
element 45 resize 33% arrange to the left of the champagne bottle
element 53 resize 25% arrange to the right of the element cluster on the left side
element 6 resize 35% arrange bottom center
element 9 resize 45% arrange across top
apply gradient glow 5 fat, color #d5b55f
element 21 resize 40% arrange on top left,below the template layers,
duplicate & mirror
element 2 resize 25% arrange at the bottom
apply gradient glow width 10 fat, white and #d5b55f
crop and resize
add your copyright and credits as needed
add your text and save


No comments:
Post a Comment